Instructions to Create More Dramatic Shots With Vignetting
In photographic talk vignetting is essentially a lessening in brilliance of a picture around its edges.
Vignetting partitions sentiment in the photography network. Individuals either adore it or loathe it. Here at Smart we're going back and forth.
Whatever your point of view, the essential capacity of a vignette ought to be to draw consideration far from articles at the edges of the casing.
By doing this it should concentrate the watchers eye on the genuine aim of the photo.
In the event that a vignette isn't being utilized for this reason, at that point you ought to ask yourself, 'does this picture need a vignette?'
As the picture taker you ought to be in charge and have the capacity to anticipate vignetting happening if essential. Similarly on the off chance that you need to add vignetting to accomplish a specific impact you ought to be sure about doing as such in after generation.
This blog entry will give you the instruments to do only that while likewise talking about the different sorts of vignetting and how to maintain a strategic distance from them happening in any case.
picture for vignetting highlight
Vignetting: How to make increasingly emotional pictures with vignetting
Snappy Links
Snap to rapidly hop/explore to each area
Distinctive Types
Great? or on the other hand Bad?
The most effective method to
Our Stance on Vignetting
Utilized accurately a vignette can be an incredible device for picture takers to use in after generation.
Be that as it may if this apparatus is over utilized or utilized erroneously it can make your pictures look out-dated and honestly ludicrous in todays time of photography.
Take the shots beneath as precedents.
In the left picture you can scarcely see that a vignette has been connected, it unobtrusively mellows up the edges of the photograph, attracts regard for the focal point of the edge and gives the picture a darker environment.
On the other hand on the off chance that we take a similar picture and utilize a vignette mistakenly the photograph basically watches out dated and diverts from the genuine qualities of the photo.
Instances of good and terrible vignettes
Left picture demonstrates an unobtrusive utilization of vignette while the correct picture demonstrates a brutal and clear vignette
The Different Types of Vignettes
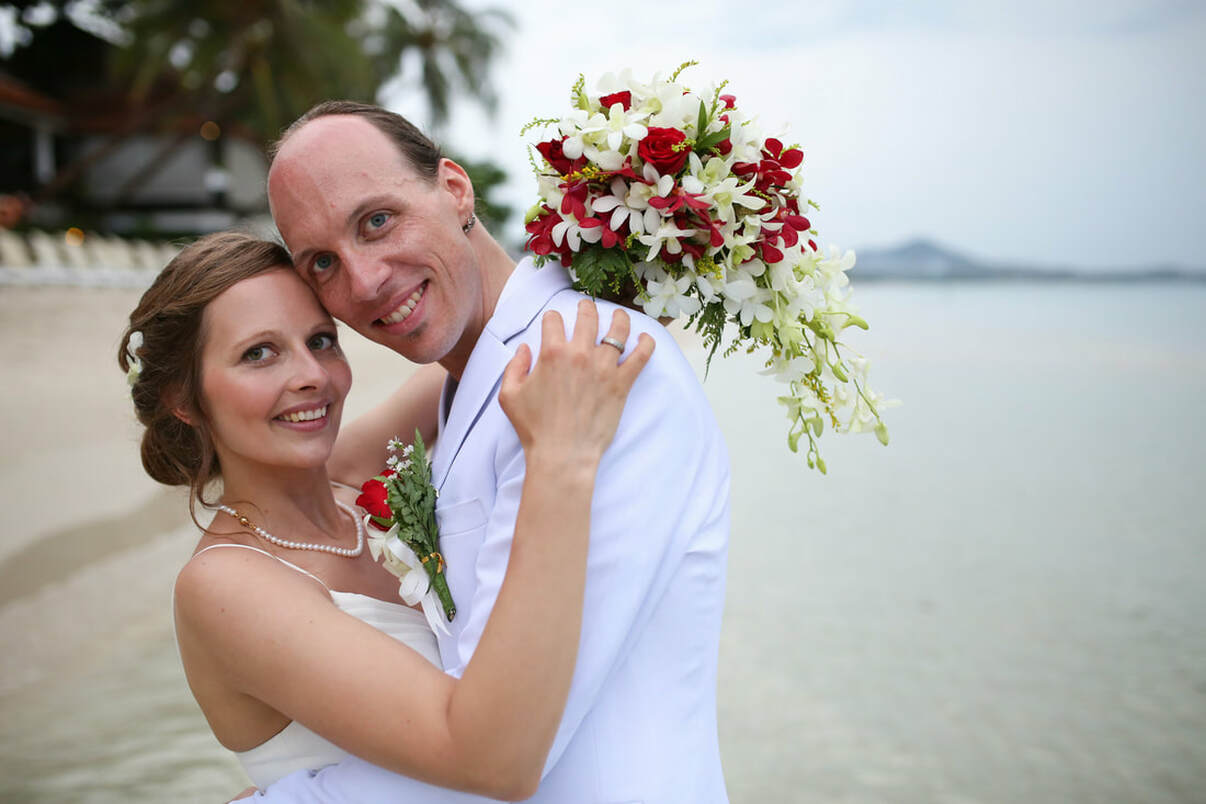
You are incredibly candid wedding photography and it very well may be brought about by different elements.
A portion of the reasons for vignetting are inside your control and you can take dynamic measures to counteract. Similarly some are only the aftereffect of the hardware available to you and may should be tended to in after generation.
Focal point Size
A few focal points are simply some of the time more awful at vignetting than others.
Ordinarily if your focal point has a major gap of state f/1.4 it is in all respects prone to vignette when shooting wide open at f/1.4. Focal points which shoot at extremely huge openings will in general have all the more working parts so as to get that going. The different kinds of components can make it somewhat harder for light to traverse and hit the sensor which can diminish the underlying force of light.
The littler you make your opening the more uncertain you are too observe vignetting inside your pictures.
Be that as it may, as focal point vignetting can without much of a stretch be fixed in after creation it's anything but motivation to forfeit a focal point which offers a high max gap.
Regular
This kind of vignetting happens when the point at which light hits your camera focal point is topsy turvy. This negatively affects your cameras picture sensor.
The pixels that are found amidst the sensor get light beams straight on at 90 degree. Dissimilar to the focal point of the sensor the pixels in the corners get light flags at a slight edge. The aftereffect of this is the pixel at the edges of the sensor don't get as much light as those found at the middle.
Modifying your settings by shooting at a littler opening won't have any impact here as it is just the manner by which light achieves the pixels on your sensor. Fortunately however you can fix this sort of vignetting in after generation so there truly is nothing to stress over in such manner.
An interesting point:
Need to adapt more photography strategies? Brilliant is the world's driving on the web photography course offering inside and out preparing, coaching and classes to creatives of any aptitude level.
On the off chance that you need to improve your photography, at that point make sure to join to Smart today!
Mechanical
This is maybe the most effortless kind of vignetting to comprehend and furthermore the least complex to fix. It is frequently brought about by an item really hindering light from achieving the cameras sensor.
This physical impediment can be brought about by anything from a larger than usual focal point hood, a focal point channel or anything that is in the focal point's field of view.
Straightforward tips to keep away from this kind of vignetting is purchase the right focal point hood for your focal point and attempt to limit the odds of something being set before your focal point that could make it produce a vignette.
Vignetting partitions sentiment in the photography network. Individuals either adore it or loathe it. Here at Smart we're going back and forth.
Whatever your point of view, the essential capacity of a vignette ought to be to draw consideration far from articles at the edges of the casing.
By doing this it should concentrate the watchers eye on the genuine aim of the photo.
In the event that a vignette isn't being utilized for this reason, at that point you ought to ask yourself, 'does this picture need a vignette?'
As the picture taker you ought to be in charge and have the capacity to anticipate vignetting happening if essential. Similarly on the off chance that you need to add vignetting to accomplish a specific impact you ought to be sure about doing as such in after generation.
This blog entry will give you the instruments to do only that while likewise talking about the different sorts of vignetting and how to maintain a strategic distance from them happening in any case.
picture for vignetting highlight
Vignetting: How to make increasingly emotional pictures with vignetting
Snappy Links
Snap to rapidly hop/explore to each area
Distinctive Types
Great? or on the other hand Bad?
The most effective method to
Our Stance on Vignetting
Utilized accurately a vignette can be an incredible device for picture takers to use in after generation.
Be that as it may if this apparatus is over utilized or utilized erroneously it can make your pictures look out-dated and honestly ludicrous in todays time of photography.
Take the shots beneath as precedents.
In the left picture you can scarcely see that a vignette has been connected, it unobtrusively mellows up the edges of the photograph, attracts regard for the focal point of the edge and gives the picture a darker environment.
On the other hand on the off chance that we take a similar picture and utilize a vignette mistakenly the photograph basically watches out dated and diverts from the genuine qualities of the photo.
Instances of good and terrible vignettes
Left picture demonstrates an unobtrusive utilization of vignette while the correct picture demonstrates a brutal and clear vignette
The Different Types of Vignettes
You are incredibly candid wedding photography and it very well may be brought about by different elements.
A portion of the reasons for vignetting are inside your control and you can take dynamic measures to counteract. Similarly some are only the aftereffect of the hardware available to you and may should be tended to in after generation.
Focal point Size
A few focal points are simply some of the time more awful at vignetting than others.
Ordinarily if your focal point has a major gap of state f/1.4 it is in all respects prone to vignette when shooting wide open at f/1.4. Focal points which shoot at extremely huge openings will in general have all the more working parts so as to get that going. The different kinds of components can make it somewhat harder for light to traverse and hit the sensor which can diminish the underlying force of light.
The littler you make your opening the more uncertain you are too observe vignetting inside your pictures.
Be that as it may, as focal point vignetting can without much of a stretch be fixed in after creation it's anything but motivation to forfeit a focal point which offers a high max gap.
Regular
This kind of vignetting happens when the point at which light hits your camera focal point is topsy turvy. This negatively affects your cameras picture sensor.
The pixels that are found amidst the sensor get light beams straight on at 90 degree. Dissimilar to the focal point of the sensor the pixels in the corners get light flags at a slight edge. The aftereffect of this is the pixel at the edges of the sensor don't get as much light as those found at the middle.
Modifying your settings by shooting at a littler opening won't have any impact here as it is just the manner by which light achieves the pixels on your sensor. Fortunately however you can fix this sort of vignetting in after generation so there truly is nothing to stress over in such manner.
An interesting point:
Need to adapt more photography strategies? Brilliant is the world's driving on the web photography course offering inside and out preparing, coaching and classes to creatives of any aptitude level.
On the off chance that you need to improve your photography, at that point make sure to join to Smart today!
Mechanical
This is maybe the most effortless kind of vignetting to comprehend and furthermore the least complex to fix. It is frequently brought about by an item really hindering light from achieving the cameras sensor.
This physical impediment can be brought about by anything from a larger than usual focal point hood, a focal point channel or anything that is in the focal point's field of view.
Straightforward tips to keep away from this kind of vignetting is purchase the right focal point hood for your focal point and attempt to limit the odds of something being set before your focal point that could make it produce a vignette.
You can test by capturing a plain white surface and testing regardless of whether the expansion of your channels/focal point hood make a vignette.
Purposeful
Deciding to purposefully include vignetting in after creation is what parts feeling candid wedding photography network.
A few picture takers love to utilize it as they think it include show and confines the imperative component of their picture.
Then again you have picture takers who detest vignettes and incline toward a cleaner stylish to their pictures.
The adequacy of a vignette truly relies upon the sort of picture and the general objective. A picture that is as of now dim commonly may truly profit by its edges being obscured. Though a similar vignette on a fresh light photo may make it look accidental and untidy.
Is Vignetting Good or Bad?
As recently examined we feel that an unpretentious vignette can add genuine dramatization to certain photographs. The sort of photos that we think it works best with are ones that are as of now very dull and grouchy regardless.
It additionally appears that a representation shot will show signs of improvement with a vignette than state a bright scene photograph or a picture that is transcendently white.
Sorts of photographs that suit vignetting
As should be obvious in these precedents underneath the dim representation truly profits by obscured corner and attracts the watchers consideration regarding the topic.
It makes a totally different dynamic for the officially shocking photograph.
Case of no vignette versus picture with a vignette
The left picture doesn't have a vignette while the correct picture has a delicate unobtrusive vignette
Then again we connected that equivalent vignetting procedure to the spotless white photograph beneath.
The vignetting for this situation looks excessively clear and nearly just as the photo hasn't been done.
white picture with vignette and white picture without vignetting
The best picture doesn't have a vignette while the base picture does. Which looks better?
Step by step instructions to Add a Vignette in Lightroom/Vignette Controls Explained
Controlling vignette in Lightroom
Left: 'Impacts' control board. Right: 'Focal point Corrections' control board.
It is an extremely simple strategy to play around with adding vignettes to your pictures in Lightroom.
Just explore with the 'Impacts' board in your 'Create' module. You will be given the accompanying controls under the heading 'Post-Crop Vignetting'
Here is a concise diagram of what every one of the controls does.
Style
The style alternative in the impacts board of Lightroom enables you to change the manner by which the vignette responds with a photograph.
Beneath we have exhibited how the 'Style' alternative impacts a similar picture so you can see it in real life. All other setting have remained the equivalent.
There wasn't quite a bit of a contrast between 'Feature Priority' and 'Shading Priority' in the picture we inspected it on.
Unique picture with no vignette included
Feature Priority
This capacity takes into account the recuperation of specular features. One drawback is that it can create shading shifts which are not constantly attractive.
